Sunday, 27 January 2013

Swatch Book


I keep a lot of my crafty bits and bobs in boxes and I never really know what I have, so I need a handy reminder.  I keep intending to make swatch books and I never do.   Well, this is the year and today was the day.  Here are my swatches of my shimmer sprays.  I have six Cosmic Shimmer ones and the others are Moon Glow ones from a long time ago.   I added some distress re-inker to a few of them to give them more colour.

I haven't used my sprays for a while, so I was surprised to find only one of them wasn't working properly.  It turned out the one that wasn't working was actually broken and easily replaced by another spray bottle that I had with water in it, which was luckily exactly the same size as the broken one.  Lucky!  I do now need another one for spraying just water though.

These swatches are ATC-sized-- 3.5 x 2.5 inches-- and they hang from a book ring.  I am going to keep all my swatches on one ring as long as they will fit.  Also on this ring are my distress stains and distress inks swatches.

Now that I can see at a glance what my options are, I will be more likely to use my sprays, stains and inks more often, and even in combination!  Score one for organisation.

Saturday, 26 January 2013

The Crackle Factor!

I happened upon some acrylic crackle medium this week when I should have been shopping for more practical things.

I had no idea what made the best cracks, so I decided to use my art journal to experiment.

I tried thinly and thickly applying the crackle medium and then putting the paint over the top but got not much crackling at all.  Odd.

Then I tried really blobbing on the crackle medium.  I gave each one different drying times and started to see a result.


I saw some people online using glossy accents underneath Ranger Crackle paint with some great results.  It got me thinking what else I could put between the base layer and the crackle layer to change the characteristics of the crackles.  I tried the paint-only way, then I tried using Klear floor polish.  I have it for other crafty applications so I figured it was worth a try.  Finally, I tried Glossy accents and Prism paper glaze.  The glaze was smelly and requires clean-up with turpentine (White Spirit).  The most dramatic results came from the Prism glaze in the lower right hand corner, but in second place was the way the manufacturers intended at the top.


Crackle Factor:  The Result formed an art journal page at the end of my experimental patches.  I have since painted up some of the pages in between my test pages and they will become background pages made with leftover ink and paint splodges from other projects as I make them.  I like the idea I got from Julie Fei-Fan Balzer about using an art journal page or tag or piece of paper to absorb excess product and act as a starting point for later.

A little note about my art journal:  Not very impressive is it?  I'm using it to experiment and write down what I learn about certain products.  I'm hoping to get into art journaling more but at the moment it's a practice book.

Wednesday, 23 January 2013

Fixed it!


The oddness of the cork area on my art journal has been repaired now.  You may now look at it. :)

You can spot the awkwardness of the previous photo now too, can't you?  Scroll down two or three entries and you'll see it.

I've been out shopping today.  I went to get a clothes drying rack and I came back with said rack, plus three bottles of acrylic paint, one of which is crackle.  I know now what I must do. :)


Phoning it in?


Two scrapbook pages, whipped together nicely using the Basic Grey Plumeria Collection Pack.  Just stickers, paper, photos, and some clever cutting.  It all came together so fast, I felt like I was "phoning it in."  I need  to jettison this attitude that something has to take a long time to be good work.  I'm happy with these pages.  They just didn't take hours to make!

Another thing that these layouts have in common is that the background sheets have a pattern on it that I didn't want to lose behind photos, so my trusty craft knife came in very handy.  I cut around the parts of the design I wanted to keep and I tucked the photos in.  It's a great technique, and one I haven't used in a while.

Saturday, 19 January 2013

Crafting with Vixie


I thought I'd sit down and make some samples of my own cardmaking to take along to a popular chain store at which I might demonstrate.  That didn't happen, as my little 5 year old daughter came skipping in and asked too many questions.  I ended up crafting with her instead, and it was a blast!

I had bagged up some little toppers I had made with some rubber stamping, colouring-in  and glitter, matted on cardstock with a punched border at the bottom.  I had intended to use them later on my own cards, but the skipping girl got them, and this is what happened.

I set out some ivory A6 card blanks for her.  She asked if she could use some of the paper that came in the post--I received two pads of NitWit designs papers from Lili of the Valley not so long ago-- so I got them out and showed her how to choose papers for a card.

I taught her how to tear the paper so that you get different edges.  I also taught her how to ink the white edge with chalk ink pads, and further, how to crumple the paper and re-flatten it, and skim the paper with the chalk pad to create a distressed look.  She enjoyed all that!  I also showed her how to position the topper so that it looked good and could fit a sentiment on the side, which she selected and stamped herself!  I think her positioning is great!

Alas, I have no samples for the shop in question... yet.  We're due for some snow on Sunday, and I am planning not to leave the house all day, so it's just me and my paper... unless Vixie comes skipping in again.  Who am I to discourage creativity?

Friday, 18 January 2013

Over the Page...


As promised, 24 hours later, here is what is over the page in my Art Journal.  I went over to a large chain store to see about demonstrating and while I was there, I had a look around (you have to!) and in the gift-wrapping section, I found this beautiful botanical tissue.  The lady in the shop asked what I was planning to do with it, I said I was going to crumple it up, put some distress ink on it, get it wet, flatten it out, dry it, layer it up onto something... and so I did!

This is another art journal page.  The book itself is all Kraft paper, so I blobbed some cream acrylic onto the page, watered down a few other colours and plopped them on a little bit, did the above to the tissue and applied it with Mod Podge.  Also to get the Mod Podge treatment was this fantastic Memory Box die cut at the bottom.  Isn't it gorgeous?  And the off-cuts can be saved and used later as flower centres or whatever!

This allowed me to play a little and come up with a colour scheme for some cards, so this might come back to haunt you in the near future!!

There are not enough hours in the day.  I wanted to move on to making the cards today but I had to tidy away and get ready to pick up the kiddies.  There's always tomorrow, I guess...

Thursday, 17 January 2013

A smattering of bits...

I've been up to a whole lot of no good lately.  Here's some proof:


Shimelle's Pretty Paper Party has been re-started for a group of us, so I have done my first scrapbook page for months on Tuesday.  I don't want to stop now!

This one uses a Bazzill cardstock base and some various patterned paper from my stash.  I cut the title with my craft robo three times and stuck one on top of the other, coloured the edges black and covered them in teal Stickles.  Voila!  Fake Thickers. :)  Font freaks, this one's called Wish I Were Taller.


I bought this Carousel Horse stamp over a year ago and I tried colouring it in with markers and it just looked a bit silly.  I think it's best in a "shabby chic" situation with Distress Ink.  The flowers are made with old dictionary paper and a Tonic Studios flower punch.  They are coloured with Distress Stain and the middles are filled with Distress Stickles.  No, I am not paid by Ranger!!   I should be. :)  This is a highly layered creation with die-cuts, stamping, direct-to-paper inking, and who knows what else!  It took all day to get to this stage but now that I've done it, it can be easily reproduced.  I think the hardest thing in crafting is deciding what to use and where to put it. :)


Safely at home with my paints and other supplies, I have had time to play.  This is take two of my dubious Erlenmeyer-Flask-themed Art Journal cover.  I think it's done now, but boy did it look strange the first time I tried making it!  I Gessoed over half the background and re-painted the flask itself, added a fire underneath it and it's fine if you don't look at it too long.    Look away now and you might not figure out there's a serious anomaly in the cork area... :)  I plan on going back and fixing that soon.  Don't look at it though!  :)  You're still looking, aren't you?


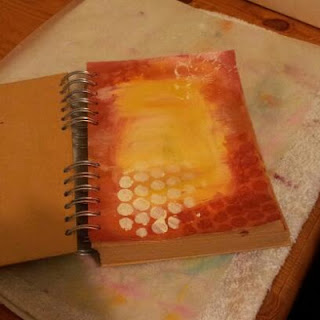
The point of most journals is to write in them, so I am making Art Journal pages that have room for the written word.  This is the first page.  I just squished some paint and stencils around and got this.  It's nothing particularly original, but it's mine and I love it!

What's over the page?

You'll find out soon.  Maybe even tomorrow. ;)

Sunday, 13 January 2013

Parrots!


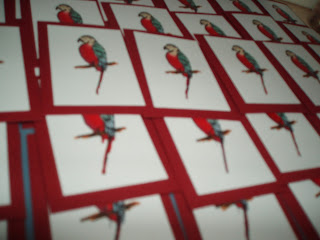
Don't bother clicking to enlarge this one, it's a little blurry.  I'm not good at taking photos with unfamiliar camearas... Incidentallly, thanks to KraftyKaren for lending me her cameara. :)

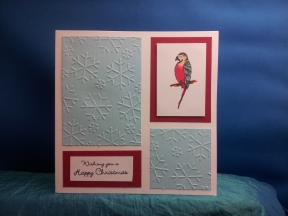
These parrots are just teensy little parrots done in promarkers and matted onto crimson cardstock to make up one of the four panels on my son's class Christmas cards.


If this picture looks familiar to you, then you must have seen it at Happy Accident Studios, my business website.  If you live in the Medway area of Kent, I aim to start teaching classes there this year.  I'm still sorting some things out.  Do get in touch!

Did you ever wonder what happened to the penguins from my previous blog post?  They were each given a good home on their own little card with snowflakes and a holly vine.  Aww,  bless.


The new year has brought some new projects, I will blog them... eventually.  You know what I'm like!!